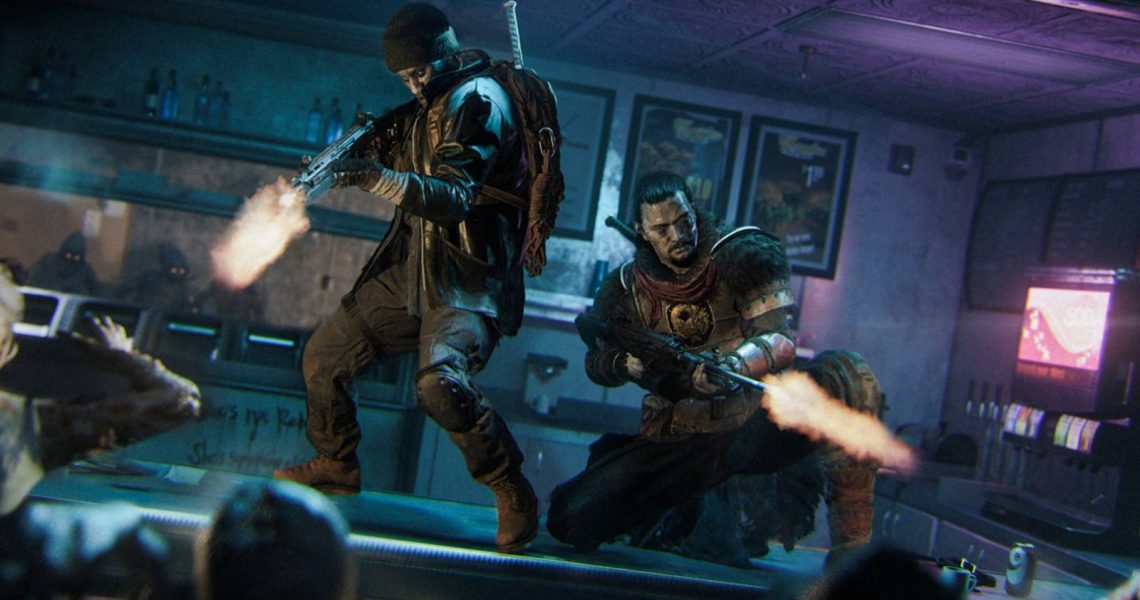
Things to Do First in Ashes of the Damned
Black Ops 7 Zombies‘ launch map, Ashes of the Damned, is filled with content. This expansive map is larger than ever, showcasing that the threat of the undead hordes is even more dangerous in the Dark Aether. If you want the best chance of surviving in Black Ops 7 Zombies, then you should check out our step-by-step guide for Ashes of the Damned so that you can get the best chance of surviving possible. This guide will walk you through what you need to do first, from Round 1, all the way to your first encounter with the Zursa bear, so that you know when to spend Essence and Salvage, and where you need to go next.
Free T.E.D.D. From the Server Room and Get Ol’ Tessie Moving
By Round 3, It’s Time to Leave Janus Towers Plaza
As you spawn into Ashes of the Damned, the first thing you will want to do is focus on Critical Kills by killing zombies through headshots. This will provide you with 115 Essence (points) per elimination, which is more than the standard 90 Essence you would get if you killed the zombie through any other method. After racking up 1,250 Essence, head south of spawn at Janus Towers Plaza to unlock the Server Room. Inside the Server Room, when facing the southwest area, you can look down to find a grate on the floor. If you melee the grate, you will pop open a lid and reveal T.E.D.D.’s Head, which you can pick up and take to Ol’ Tessie. Ol’ Tessie is the truck found outside the Server Room, and by interacting with it once you have T.E.D.D., you will activate it as the driveable vehicle in Ashes of the Damned. Ol’ Tessie is an essential part of this map, so be sure to stay by her side.
Travel to Vandorn Farm and Activate the Power
Vandorn Farm Remains the Best Training Spot to Farm Essence and Salvage
Now that you’ve acquired Ol’ Tessie, enter the driving seat and use RT/R2 to accelerate, and the left stick to steer. Drive Ol’ Tessie east of Janus Towers Plaza, where you will find wooden barriers in the way. By driving through these barriers, you will be able to access the next area. While you can instead go west, we decided it was best to go east as that will take us to Vandorn Farm, which is the easiest and friendliest place to farm zombie kills. Be warned that driving in the fog within these connecting locations between landmarks will see an abundance of zombies spawn, so just focus on the road ahead and drive into the glowing green Dark Aether plants to heal Ol’ Tessie and get free Essence and Salvage, but avoid the red plants!
Once you’ve made it to Vandorn Farm, head to the Power Pump located on the north side, and use your weapon to shoot at the glowing bulbs. You will have 30 seconds to destroy all of the glowing bulbs by shooting them, and there’s a final bulb that appears on the top of the Power Pump. After doing so, head south and open the Barn, which costs 1,750 Essence. Upstairs in the Barn, you’ll find a power switch to allow you to use Vandorn Farm’s Perks and The Arsenal. However, the Perks are useful for now, and we mainly want to remain in this area for a few rounds to build our Essence before moving on. We recommend staying at Vandorn Farm until you have acquired Tier 2 Armor in the Garage for 4,000 Essence, as this will protect you from more zombie attacks. Then, once you have at least 5,000 Essence, it’s time to leave for Ashwood.
Head to Ashwood for All Your Upgrades, Including Pack-a-Punch
Ashwood Has Pack-a-Punch, The Arsenal, and Essential Crutch Perks for Survival
By Round 7, you should be on the way to Ashwood. You can reach this location by taking Ol’ Tessie and heading through the newly opened gate in the south, which will take you through the Grounded Ship and eventually to Ashwood. Just follow the linear road through the ship and hit the green plants for health, and you’ll be fine. Once you’ve arrived at Ashwood, leave Ol’ Tessie parked by the locked garage. Look east, and you’ll find a zipline that can be taken vertically upwards to the upper parts of Ashwood. Once inside, head right and open the locked door at the Market Square for 1,000 Essence, and then the next locked door at Judgement Square for 1,750 Essence. This will allow you to access Ashwood Bridge, where you have another Power Pump to activate by shooting the bulbs within 30 seconds.
With the Power Pump activated and the Power Switch flipped, the garage where you left Ol’ Tessie will be opened, and you can drive her inside. At the west wall inside the workshop, you’ll find the Pack-a-Punch Machine on a workstation, which you can interact with to place on Ol’ Tessie. This is a vital upgrade to Ol’ Tessie, as not only will it provide you with a boost feature for the car, but it also allows you to Pack-a-Punch your weapons from the rear end of the truck.
Focus On Acquiring Salvage and Essence for Additional Upgrades
It’s Time to Upgrade Your Gun and Grab Vital Perks
Now that you have activated Pack-a-Punch, you’re going to want to spend your Essence on a few upgrades. Since you should have acquired Tier 2 Armor earlier, your health should be fine for now, but why don’t we up the damage? Acquire 5,000 Essence and upgrade your primary weapon at Ol’ Tessie by using Pack-a-Punch. This will give your gun a noticeable kick. To buff your weapon even more, head up the east zipline into Judgement Square and spend 500 Salvage on The Arsenal for the Uncommon Tier Upgrade for your Weapon Rarity to increase its damage. At this point, it should be around Round 8 or 9, and you’ll have a Pack-a-Punch weapon, Tier 2 Armor, and an increase to Weapon Rarity.
Stay in Ashwood for now, as there are two Perks to grab here before moving on. When you have 5,500 Essence from killing zombies, take the zipline back to the Ashwood Bridge and enter The Ruby Rabbit, where, downstairs at the north wall, is Jugger-Nog. This Perk will increase your total HP. Secondly, and this can be skipped if you’d like, we recommend grabbing Vulture Aid in the Market Square, as this Perk will ensure you get more drops from enemies. These drops can be more Essence, Salvage, and Equipment, which are all very important things to get early on, as Salvage helps increase Weapon Rarity, and Essence provides points to buy Perks and Pack-a-Punch.
Fill Out the Map and Grab Additional Perks
Get More Essence to Open the Map and Grab Even More Perks
With Pack-a-Punch, Jugger-Nog, and Vulture Aid acquired, you can safely leave Ashwood behind, as this place isn’t that great for farming zombie kills. Now, take Ol’ Tessie southwest, where you’ll drive through the Orda Graveyard to reach Exit 115. This location is great for farming kills due to its lengthy avenues and spacious obstacles. Once here, spend 500 Essence on the locked door at the southwest corner to get McDougal’s Service Station opened, and you’ll find the Deadshot Daiquiri Perk here. This is useful as it will help you ADS to the head automatically, and you get more damage for headshots. Now that you have 3 Perks, we recommend farming kills in this area until you get 10,000 Essence, then spend that Essence on Tier 3 Armor, as that will allow you to get hit even more times from zombies without going down. Just remember to replate your armor, and you’ll get more armor plate drops from zombies thanks to Vulture Aid.
With 3 Perks and Tier 3 Armor, it’s time to take Ol’ Tessie back to Ashwood, and then northwest through the Lost cabins so that you can reach Blackwater Lake. This is an area that also has a Power Pump to activate, and you can enter the Cabin with 1,750 Essence to get Speed Cola upstairs. This is great for reloading faster, and for equipping armor plates faster, which comes in handy when more zombies begin to attack. Lastly, head back to spawn’s Janus Towers Plaza area, and purchase Quick Revive in the Server Room, as this final Perk will allow you to regenerate your health faster.
Complete T.E.D.D. Tasks and Prepare for the Fight of Your Life
Earn Free Perks and More with T.E.D.D. Tasks, and Invest in the Napalm Burst Ammo Mod
At this point, you should be progressing through the rounds until you see an alert on your HUD at the beginning of a Round that reads “A T.E.D.D. Task Has Appeared” alongside its location. You should always go out of your way to head to these T.E.D.D. Tasks, as they only cost around 500 Essence, and after completing a brief challenge, they reward you with Salvage, Essence, free weapon rarity upgrades, and even a Perk! This Perk also comes at no extra cost, meaning you can drink it and it will not increase the price of your next Perk.
Thanks to the T.E.D.D. Task, and the Salvage you would have received while driving through plants and Vulture Aid, you should have at least 500 Salvage by now. Take this to any of the Arsenal Machines, but we recommend, at this point, returning to the Farm for the safest place to farm zombies. Purchase the Ammo Mod: Napalm Burst, as this is super effective against Elite Enemies known as Zursa, which are zombie bears. Now that you have an appropriate loadout, the real fight begins in this round-based survival mode. In Round 16, Zursa will spawn, and with your gun equipped with Pack-a-Punch, additional rarities, and Napalm Burst, you should be able to kill it fast by shooting its glowing weak spots and the head.
Now all that’s left to do is continue to get Essence to buy more Perks around the map and get to Pack-a-Punch Tier 3, and use Salvage to upgrade your weapon rarity.

- Released
-
November 14, 2025
- ESRB
-
Mature 17+ / Blood and Gore, Intense Violence, Strong Language, Suggestive Themes, Use of Drugs
