Sunderfolk Sacred Sands One-Shot Walkthrough
This article was produced in collaboration with Valnet Inc’s sponsor, Dreamhaven.
Sunderfok 2.0 has brought a One-Shot Mission called Sacred Sands, a challenging combination of puzzling, survival, and a battle of wits against wretched, cursed foes and an ancient evil that awaits a group of heroes to vanquish it.
Sacred Sands is divided into 4 Chapters / Missions: Visitor from Afar, Untold Treasures, Silent Catacomb, and Sacred Throne. For those starting with this adventure, this full walkthrough will guide you through the Sacred Sand One-Shot.

Sunderfolk’s Rogue Class Explained
The Rogue is a classic archetype, but Sunderfolk puts its own twist on the class, with a developer speaking to Game Rant about it in an interview.
Mission 1 – Visitor From Afar Walkthrough
Mission Overview: The objective of this mission is to protect the Sacred Bug from the Cursed Mummies. To do so, players will need at least two frontliners and an AoE damage dealer, like the Pyromancer or the Arcanist, to cleanse the mummies before they hurt the Ally. Players can also interact with the Sacred Bug to heal it and move it around the battlefield.
Dev Tip: This is an ally protection mission, with a large number of enemies that can apply Decay, hurting you whenever you move. Abilities with leaps, pushes, or which allow you to deal damage without moving will help you properly position yourself defensively while minimizing damage from Decay.
- Recommended party: Vanguard, Berserker, Pyromancer, Ranger
|
Enemies |
Skill Cards |
Passive |
|---|---|---|
|
Mummy |
||
|
Elite Mummy |
Combat Tips:
- Interact with the Sacred bug with each party member to keep it healthy (Heals 2 HP per interaction).
- Surround it to protect it from the swarming mummies
- Using the Vanguard’s Into the Fray is a great way to push back enemies away from the Sacred Bug
- Mummies have a passive called ‘Return to Sand’ which will turn them into a Sandstone statue when they die. After a few turns, they will resurrect.
Players can take advantage of dead mummies to create barriers. Make sure to eliminate the Sandstone with AoE attacks before the timer runs out, or they’ll be swarming your heroes. The sacred Bug’s Sanctify also inflicts 1 damage on every adjacent Sandstone Mummy.
The chest at the bottom contains 100 Gold Coins. The Shrine offers healing to one selected target, but can be used only once.
The mummies and elite mummies will use ‘Curse Upon You’ to inflict Decay, a DoT status effect that will cause 1 damage per movement from the moment Heroes abandon their hex. The sacred Bug can cleanse it once every few rounds using Sanctify, so staying close to it will allow players to survive.
Once the timer marks the end of the survival battle, players need to interact with the Sacred Bug once more to throw him to the exit tile (marked with a bright star).
Landing the Sacred Bug on the right tile can be a bit tricky, but with some practice, players will be able to do it before the mummies swarm the party.
Mission 2 – Untold Treasures
Mission Overview: Interact with the Chest to begin, and then find the Four Keys, and defeat the Mimic King. The objective of this mission is to find all 4 Keys while protecting the Sacred Bug from the swarm of Mummies and the Mimic King infesting the sacred treasury.
Dev Tip: Although you need to defend your ally, this mission is really more of a brawl. Bring cards with high movement and high attack to clear out the mummies and dodge mimics. Any spells with a movement after an attack will also help you punish mimics while staying out of their range.
- Recommended party: Vanguard, Berserker, Pyromancer, Ranger
|
Enemies |
Skill Cards |
Passive |
|---|---|---|
|
Mummy |
Curse Upon You: Moves 2, Attacks for 3, and applies Decay. |
Return to Sand: When defeated it will transform into a Sandstone. |
|
Elite Mummy |
Curse Upon You: Moves 2, Attacks each adjacent hero for 3, and applies Decay. |
Return to Sand: When defeated it will transform into a Sandstone. |
Mummies and Elite Mummies can curse players and will turn to Sandstone after being defeated, resurrecting after a few turns. Players can break Sandstone to prevent them from resurrecting.
As for the Mimic King, it has two very distinctive (and troublesome) actions it can take: it calls more Mimics to the battle every few turns (others will appear when interacting with chests), and swallows coins from the players, and throws them over nearby tiles.
The (lesser) Mimics have the same Hoard attack, which causes players to lose 30 gold. The coins will scatter randomly across adjacent hexes, and both Mimics and Mummies can pick up the gold, so make sure to slay them and recover them fast.
Pay attention to the Falling Sand. Hexes placed below falling sand will damage heroes on the next turn. Keep moving the heroes to prevent them from receiving damage. Sand falling on an unoccupied Hex will turn into Sandstone, which will eventually break, spawning new Mummies.
The best strategy to beat this mission fast is to use knockback with the Vanguard and use skills from the Ranger to generate Vines, preventing the enemies from moving around too much.
Using the Pyromancer to create Fire Tiles can also help halt the advance of Mummies and Mimics, allowing players to open the chests and uncover the remaining keys.
The first 2 Keys can be located at the bottom-right corner inside three chests. One of the keys is in the top right chest, and the second key is inside the lower-left chest (the remaining chest contains 100 gold).
The third Key is located on the chests on the left side of the room, but beware: two of those chests will turn into Mimics once players interact with them.
To the Rescue and Bladefall from the Vanguard are the perfect moves to control large groups of enemies across the battlefield.
Once players find three keys, the Sacred Bug will notice the fourth remaining key has been ‘eaten’ by the Mimic King, so the rest of the battle will consist of defeating it. A second phase begins, and now all that remains to be done is to destroy the Boss and claim Victory.
Focus on dealing with the Mimic King fast; otherwise, Mummies will likely swarm you, and you’ll fail the mission.
Remember: To keep the Sacred Bug healthy, interact with it and then throw him into a safe Tile to prevent Sand from falling over it, and keep it away from enemies. Just interact with it with your controller, then drag to a safe tile and throw it there.
Mission 3 – The Silent Catacomb
Mission Overview: The objective of this mission is to light up all the Braziers in the room, starting with the one placed in the Center of the Room. It will immediately summon the spirit of an ancient Warrior (Elite Mummy). Once players have lit up all Braziers and defeated all Warriors, the missions will be completed.
Dev Tip: This is a puzzle mission with lots of pits and minebugs to help take out enemies with. Your build should focus on high movements, leaps, and utility cards to get yourself out of danger and make the best use of the environmental hazards.
- Recommended party: Berserker, Vanguard, Arcanist (or Pyromancer), Ranger
|
Interact/Hazards |
……………………………………………………………………. |
|---|---|
|
Brazier |
Players can interact with them to light them up. (As part of a Movement Action). |
|
Crumbling Tile |
Stepping on it and using any type of movement will result in it turning into a Pit. |
|
Pit |
This hex will instantly KO any monster or hero. The hero’s corpses will appear on the next safe hex after hitting 0 HP. |
|
Treasure Chest |
Contains Valuables. |
|
Shrine |
Can be used once per combat to heal an ally unit. |
- Minebug: It moves 4 hexes per Neutral Turn, pushing back everything on a straight line. Throwing both enemies and Heroes into the Pits.
- Sacred Bug: Your ally on this mission. It will eliminate Decay and cause damage to Sandstone statues (Dead Mummies).
To fulfill the objectives of this Mission, players must light 5 braziers and defeat the 5 ancient warriors to proceed, starting with the brazier on the middle of the room. Be careful not to stand for too long on crumbling Tiles, and use the Pits to eliminate enemies by pushing them. The Berserker’s Fling or Vanguard’s Bladefall and Knock ’em Back will do the trick.
From the second turn onwards, Minebugs will spawn, pushing enemies (and allies) to the sides and cause damage in their path (marked as a blue trail on the ground). Be careful not to fall into a pit because of this. Stay away from the Minebug’s trail, and above all else: Make sure the Sacred Bug is safe from their charge as well. Minebugs always move 4 tiles (hexes) per turn, and their trails begin and end at an orange hex.
Minebugs can automatically defeat Ancient Warriors by pushing them into the Pits, so make sure to root them in their trail by using the Ranger’s Vines (created using abilities like Wildbloom or Knockback). Enemies or Sandstone statues in the way will be damaged as well.
Once players activate all 5 Braziers and defeat all 5 Ancient Warriors, the entrance to the Sacred Throne will open, and they’ll be able to advance to the last and final mission.

Sunderfolk’s Ranger Class Explained
Game Rant speaks with a Sunderfolk dev about the specific character fantasies and gameplay roles that its Ranger class fulfills.
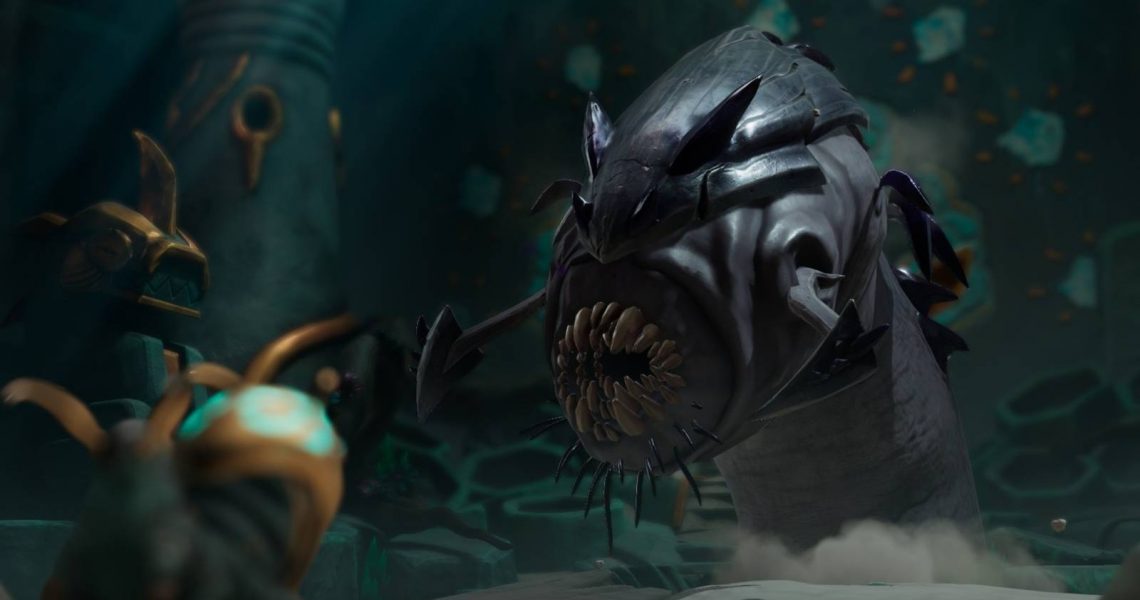
Mission 4 – Sacred Throne
Mission Overview: The moment has come to reclaim the Sacred Bug’s rightful place. The problem is there’s an enormous Ancient Wurm squatting in his throne room. Defeat the Ancient Wurm and its minions to finish the One-Shot, but be careful not to fall prey to this evil monster’s dangerous attacks. To do so, players will have to collaborate and be extremely careful not to fall on the borders of the arena (Pits), or they will be immediately KO’ed. As usual, protect the Sacred Bug and keep a close eye on the Mummies spawning at both sides of the arena.
Dev Tip: The boss in this encounter is a large, stationary target who can move your characters around. You should prioritize ranged attacks if you have them, and any utility cards that could pull an ally out of danger- but remember that pushes, enchants, and throws won’t work on the boss.
- Recommended party: Berserker, Vanguard, Arcanist (or Pyromancer), Ranger
Boss – Ancient Wurm: It will act between turns, pick different attack cards, and occupy a large area (7 hexes). Any attack hitting those hexes will affect the Ancient Wurm.
Rubble Fling: Throws stones affecting 6 hexes. It will use this ability when Heroes are grouped together, and always focus on the bigger group to maximize damage. Inflicts Weak and Exposed, and pushes back targets 2 tiles. Rubble fling will also create Sandstone in unoccupied hexes, spawning more mummies after a few turns.
Ancient Tremble: Sucks in the air around it and then blasts the ground around, causing damage to all adjacent targets.
Wurm: These enemies will spawn from a designated Hex to accompany the Ancient Wurm, and cannot be pushed or moved. Make sure to keep an eye out for Worm Burrows during the battle to prevent them from respawning. They have two successive attacks, one that allows them to move (burrow) around the arena and attack, and a 7 Hex AoE that pulls units close, then causes moderate damage to all nearby targets.
Mummy: The same enemies from previous missions. Watch out for their Curse Upon You attack, and keep your squishier party members close to the Sacred Worm for purification.
The combat poses a significant challenge due to the sheer enemy volume, and the constant offense from the Ancient Wurm. It will target whoever is in sight, no matter if there are enemies or allies in its range of fire.
One of the two Healing Shrines is a Mimic in Disguise, be careful!
Worms pulling heroes close using Swallow The World will prime them for an attack from the Ancient Wurm, who will seize the chance to inflict as much damage as possible using Rubble Fling. Players should use one of their Interactions per turn to keep the Sacred Bug moving, throwing it around the arena.
Once the Ancient Wurm is defeated for the first time, it will be time for Phase 2: Collect the Bright Orbs. (Optional Objective)
Bright Orbs are trapped in the Black Crystals (Shadowstone Chunks) around the arena. The new objective consists of breaking the Shadowstone Chunks to liberate the orbs, then throwing the Sacred Bug to collect all Orbs, or throwing the orbs near the bug so it can absorb them.
Players still need to face the Ancient Wurm and its minions, so the best approach is to bait the attacks from the Ancient Wurm away from the Sacred Bug by keeping the two Tanks (Vanguard + Berserker) together and working side by side to crush the minor foes and attract the Ancient Wurm’s fire using Bulwark and Heroic Leap.
When players find all 4 Orbs and feed them to the Sacred Bug, it will use Final Retaliation on the Ancient Wurm. This will stun it for several turns and cause significant damage, allowing you the opportunity to finish it off.

Sunderfolk
- Released
-
April 23, 2025
- ESRB
-
E10+ For Everyone 10+ // Fantasy Violence
- Developer(s)
-
Secret Door
- Multiplayer
-
Local Co-Op
- Number of Players
-
1-4