100% Logbook & All MIssable Scans in Metroid Prime 4
In Metroid Prime 4: Beyond, as in previous games in the Prime series, Samus collects all her scans in a Logbook. As you make your way through the game, you can check the Logbook section in the menu to see your overall progress in the form of a percentage. However, where Metroid Prime 4 is different, is in the fact that there is a secret ending you can only reach by reaching 100% completion of both items and scans. With this in mind, we’re going to show how to reach 100% completion in Metroid Prime 4‘s logbook, including all missable scans.

How to Get All Missile Expansions in Metroid Prime 4
There are a total of 48 Missile Expansions to find in Metroid Prime 4, and this guide details the location of every one of them.
All Logbook Scans in the Prologue – Metroid Prime 4

Be careful! There are three main logbook entries in the Prologue, all of which are missable. If you fail to unlock these three entries during the Prologue, you will not be able to reach 100% completion.
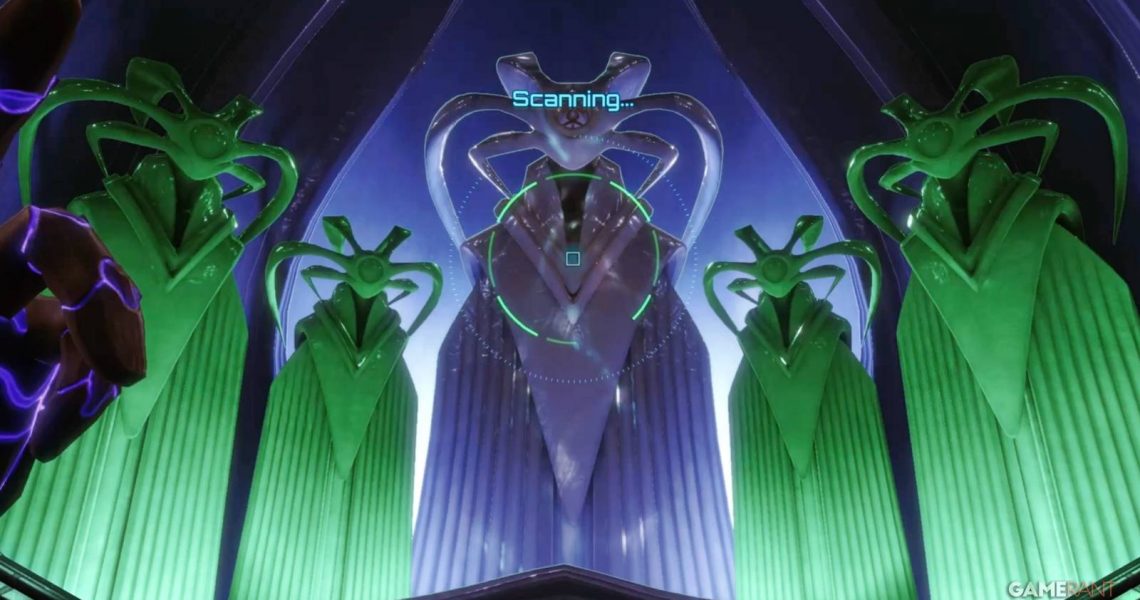
From the moment you enter the world of Metroid Prime 4, there are objects to be scanned. While there are countless objects that can be scanned, you’ll know the important entries, as they will have a ‘View in Logbook’ option at the bottom of the information box. Remember, however, that it is not only NPCs and enemies that go in the Logbook. You should always take the time to scan anything highlighted in green.
The Prologue’s three entries are:
Space Pirate – Sylux Forces – Missable:

- Category: Biology
- Subcategory: Sylux Forces
You will find the Space Pirate as soon as you enter the Prologue. They will be the main enemy you are fighting. Make sure to scan at least one of them.
Galactic Federation Trooper – Gal Fed – Missable:

- Category: Biology
- Subcategory: Gal Fed
This will be your only chance to scan the generic Gal Fed trooper. After the first fight with Space Pirates, you’ll find several troops guarding a door. Take the time to scan them at this point, there’s no reason not to.
Aberax – Sylux Forces – Missable:

- Category: Biology
- Subcategory: Sylux Forces
Aberax is the final boss Samus will face at the end of the Prologue. Make sure to scan them at the start of the fight, as you will get no other chance to do so once the Prologue ends.
All Logbook Scans in Fury Green – Metroid Prime 4

All Gal Fed Scans in Fury Green:
|
Name |
Location |
Image |
|---|---|---|
|
Myles MacKezie |
Myles can be scanned any time after you rescue him. Make sure he formally introduces himself to you, as a scan before that will not count in the Logbook. Later, he’ll be at the Base Camp in Fury Green. |
 |
All Biology Scans in Fury Green:
|
Name |
Location |
Image |
|---|---|---|
|
Aurengh Crane |
This is a flying creature that can be found in various locations around the map. At certain points, they can be found near the pond in Base Camp. If you are missing it, check the pond every time you return. If you are quick, you can catch them in Quiet Clearing when you first arrive in Fury Green, but they fly away. |
 |
|
Sicklefly |
Sickleflies are small bugs that appear similar to dragonflies. You can find them in several map sections around Fury Green. They can be scanned in the Quiet Clearing as soon as you arrive, and can be found there later if you return. They often fly in swarms, so keep a look-out for large groups flying by if you need the scan. |
 |
|
Shimmerstrap |
Shimmerstrap are often found growing from the rotted trees that surround many doors in Fury Green. |
 |
|
Glister Beetle |
Found in the tight spaces of Fury Green. You’ll see them crawling along the walls in Hollow Log, as soon as you leave Quiet Clearing. They can be found in the large loop section as well. |
 |
|
Empress Aleu |
Empress Aleu can be found flying over the very first section of Fury Green, Quiet Clearing. You’ll end up here after leaving Chrono Tower. They can also be found spread all around the map, so they are very hard to miss. |
 |
|
Red Relic Ant |
Red Relic Ants are often found crawling on roots or fallen trees around various sections of Fury Green. They can be found crawling on a large root in Quiet Clearing when you first arrive in Fury Green, along with several sections in the large loop. |
 |
|
Homing Spore |
Homing Spores are released from Ghaspores. You can find them quickly in Cleared Path, just outside Base Camp. They can also be found hovering in the Cargo Staging Area, between Base Camp and Cleared Path. You can also find them when you first arrive in the Hollow Log section. |
 |
|
Mireworm |
Mireworms can be found in many shallow water pools. They can be seen poking out of the pond in Quiet Clearing when you first arrive. They can also be found in Base Camp, poking out of the pond in the center of the chamber. |
 |
|
Ghaspore |
There are several Ghaspore around Fury Green, but you can easily find one just outside of Base Camp in the Cleared Path section. It is on the wall |
 |
|
Glottagropper |
The long-legged enemies will be encountered very early in Fury Green. The Ravine Overlook section, just after the Fury Green title appears, can always be relied upon. They can also be found at Bridge Landing, just before the long bridge. |
 |
|
Rootspur |
Found in the swamp-like areas of Fury Green. They will emerge from the water and quickly attack. Forgotten Lagoon is the first section where they will appear. |
 |
|
Bristlewort |
Small bulb-shaped enemy that shoots small needles. Found around Cliffside Gate. Can also be found near Arboreal Chapel. |
 |
|
Shren |
Shrens can be found just after Cliffside Gate, in the Guiding Roots section. |
 |
|
Jungle Griever |
Jungle Grievers first appear when you rescue Myles. They will later appear throughout Fury Green, and are impossible to miss. Scan them at any opportunity. |
 |
|
Carvex |
The main boss of Fury Green. If you do not scan here, you can always scan in the hologram chamber that displays bosses. |
 |
|
Carvex Vine |
Missable: This is the vine that extends from Carvex’s body. You have to scan it separately, and if you do not, you will not be able to get 100% Logbook Completion, so make sure to scan it! |
 |
|
Carvex’s Pollen Sac |
Missable: The large projectiles that Carvex sends Samus’ way. Make sure to scan them here, because this is the only chance. |
 |
All Fury Green Lamorn Lore Scans in Metroid Prime 4
|
Name |
Location |
Images Coming Soon |
|---|---|---|
|
The First Steps |
Found on your right in Quiet Clearing as soon as you begin Fury Green. |
 |
|
The Sacred Tree |
Found at the edge of the cliff in Ravine Overlook. |
 |
|
The Ablution |
Found at the southern edge of Cliffside Gate, at the Ancient Purification Site. |
 |
|
Sacred Relic |
Found in the Arboreal Chapel, right next to the Psychic Glove. |
 |
|
The Crossing |
Found on the left of the exit that leads from Bridge Landing to the Infinity Bridge. |
 |
|
Vahkun |
One of the four statues in the Path of Reflection. Scan the first statue on the right to unlock the entry. |
 |
|
Lekhash |
One of the four statues in the Path of Reflection. Scan the first statue on the left to unlock the entry. |
 |
|
Shei |
One of the four statues in the Path of Reflection. Scan the second statue on the left to unlock the entry. |
 |
|
Thesarh |
One of the four statues in the Path of Reflection. Scan the second statue on the right to unlock the entry. |
 |
All Fury Green Machine Scans in Metroid Prime 4:
|
Name |
Location |
Image |
|---|---|---|
|
Scout Bot |
Found on the ground in the Ancient Path section. |
 |
All Fury Green Research Scans in Metroid Prime 4:
|
Name |
Location |
Image |
|---|---|---|
|
Psychic Platform |
Scan the purple glow you find off to the side in the Cargo Launcher section to reveal a Psychic Platform. Scan the platform again to add it to the Logbook. Also found forming a path to a Missile Expansion in Cliffside Gate. |
 |
|
Psychic Container |
Found after you get the Psychic Glove and open the door to Cliffside Gate. Make sure you scan the container before opening it and collecting the Energy Tank. If you forget to scan it here, you will have a few other opportunities later, but there are not many. |
 |
|
Save Station |
Simply scan the first Save Station you encounter. |
 |
|
Sacred Shrine |
This will be the platform that you step on that transports you to the Teleporter Key dimension. If you managed to clear all four dungeons without scanning, one will always remain at the Garden of Remembrance in Fury Green. |
 |
|
Bomb Slot |
Scan the Bomb Slot on the wall near Base Camp before you move ahead. There are plenty more to find throughout the game, but this will be the first. |
 |
|
Cargo Launcher |
You can always find the Cargo Launcher at the start of Fury Green, and at the Cargo Launcher section near Base Camp. |
 |

If Metroid Prime 4 hasn’t clicked for you yet, you’re definitely not the only one
I felt the spark when I started Metroid Prime 4, but the longer I played, the more I realized I wasn’t the only one struggling to enjoy it.
All Logbook Scans in Volt Forge – Metroid Prime 4

All Biology Scans in Volt Forge:
|
Name |
Location |
Image |
|---|---|---|
|
Denzard |
You’ll find a Denzard crawling around in the Loading Airlock when you first enter Tower 1. |
 |
All Machine Scans in Volt Forge:
|
Name |
Location |
Image |
|---|---|---|
|
Flight Drone |
Flight Drones can be found circling outside the tower, near the Tower 1 Generator platform. |
 |
|
Flight Drone MCU |
This version of the Flight Drone is a miniboss you’ll have to face after restoring power to Tower 2. Located at the Tower 2 Generator. |
 |
|
Lamorn Beam Turret |
The first Lamorn Beam Turrets are found while making your way up Tower 2, after your fight with the Psy-Bot Shield. They will emerge from the walls of the chamber with Vi-O-Las in containers. |
 |
|
Psy-Bot Solider |
You’ll encounter the common Psy-Bot Solders at the front entrance to Volt Forge. |
 |
|
Psy-Bot Shield |
You’ll encounter the first Psy-Bot Shield shortly after facing “Sylux” in Tower 2. |
 |
|
Psy-Bot Teleporter |
This version of the Psy-Bot is first encountered while making your way down Tower 2. |
 |
|
Mecha Rat |
First found at the base of the Irradiation Floor. This is the chamber with the platforms that become electrified, and are constantly moving up. Watch for them scurrying across the floor in a group. You’ll encounter a massive group of them in the Assembly Floor chamber as well. |
 |
|
Xelios |
Xelios is the final boss of Volt Forge. If you miss the scan here, you can get it in the boss hologram chamber in Fury Green. |
 |
|
Maintenance Tank |
You’ll first encounter the basic Maintenance Tank while heading back up Tower 1 after turning on the Generator. |
 |
|
Scanner Drone |
You’ll encounter Scanner Drones hovering over the Showroom in Tower 1 after you get the generator running. They are found in many other locations throughout the facility as well. |
 |
All Research Scans in Volt Forge:
|
Name |
Location |
Image |
|---|---|---|
|
Vi-O-La |
You’ll see a Vi-O-La on a platform as soon as you enter the Showroom inTower 1. |
 |
|
Vi-O-La Spinner |
Any Spinner that opens a door or gate will suffice for this scan. There is a spinner just before you use the Morph Ball hatch to enter Volt Forge for the first time. |
 |
|
Spinner |
Once the power is back on, you’ll see several Spinners around Volt Forge. While making your way back up Tower 1, you’ll spot one in the chamber with the Missile Expansion in Irradiation Floor. |
 |
|
Grapple Point |
When you reach the Tower 1 Generator platform, turn left out onto the small platform and look up to find four Grapple Points on large metal beams that extend from the tower. |
 |
|
Psychic Grapple Point |
While making your way down Tower 2, you’ll reach the second to last large chamber, simply called Storage. If you look up over the center of the room, you’ll see the purple glow of a psychic object. Scan it to reveal the Psychic Grapple Point. You won’t be able to use it yet, but it’s one of the least common traversal objects, so it’s worth getting it out of the way now. |
 |
|
Grapple Node |
From the Manufacturing Floor section in Tower 1, enter the Collapsed Catwalk corridor. You’ll find Grapple Nodes on the wall that you can scan. You’ll find them later in the game as well, but this is likely the first time you’ll encounter them. |
 |
|
Lamorn Magnetic Track |
There is a strip of Lamorn Magnetic Track leading to the center tower in the Manufacturing Floor. You can scan it here, or wait until you get the Psychic Spider Ball upgrade much later. It’s better to get it out of the way the first chance you get. |
 |
|
Psychic Boost Rail |
When you reach the Tower 1 Generator platform, look at the map, and you’ll see two small platforms that extend right and left from the area close to the tower. With your back to the exit of the Morph Ball slot, turn right and look for the purple glow of a psychic object. This will be the first Psychic Boost Rail you can scan. |
 |
All Logbook Scans in Flare Pool – Metroid Prime 4

All Gal Fed Scans in Flare Pool:
|
Name |
Location |
Image |
|---|---|---|
|
Ezra Duke |
You’ll find Ezra Duke in the Boiler Room. The encounter cannot be missed. Make sure you wait until he’s introduced himself, as scanning him before that will not unlock his entry in the Logbook. |
 |
|
Nora Armstrong |
Nora Armstrong will be found later in the dungeon, in the first Clamp section you reach. |
 |
All Biology Scans in Flare Pool:
|
Name |
Location |
Image |
|---|---|---|
|
Vaernan |
You can find Vaernan crawling on the floors of Flare Pool the moment you enter the main dungeon on your first visit. They look like a biological version of the Denzard in Volt Forge. |
 |
|
Heatstrap |
Heatstrap cling to the walls of the volcanic caves. You can find one on the wall above the lava pool on your first visit to the Volcanic Entrance section. |
 |
|
Blow Hopper |
The Blow Hopper can be found in the Volcano Heart, during the first phase of the Pheronos encounter, or when you come back to Flare Pool later. They will always emerge from the lava in this section of the map. |
 |
|
Leaping Spitter |
Leaping Spitters are found in the lava pools below the Lava Lake Bridge. You won’t encounter them until you return to Flare Pool after collecting the Vi-O-La IC Suit. They may not appear when you first cross the lake, but they will when you return later to reach Pheronos, the boss. |
 |
|
Swim Snatcher |
Missable: When you return to the Volcanic Heart to collect the unaquired items, one of the three will be an Energy Tank that is stuck in a container on a small rock. After destroying the container and revealing the tank, a Swim Snatcher will appear and take it. You’ll have to chase the enemy down and scan it while chasing it. Make sure to scan it though, as this is the only opportunity you’ll get. |
 |
|
Pyremite |
You will encounter a large swarm of Pyremite in the Scrapyard when collecting the Fire Chip on your first visit to Flare Pool. They will later be found throughout Flare Pool. |
 |
|
Swarm Flyer |
There is a large group of Swarm Fliers in the Volcanic Entrance chamber when you first arrive in Flare Pool. |
 |
|
Behemoth |
Missable: The Behemoth can only be found once you return to Flare Pool after collecting the Super Missile upgrade. Clear the large rock blocking the path at one end of Lava Lake Bridge, then make your way to the Expansion Site. Scan the Mech Part sitting on the upper ledge, and the Behemoth will appear. Remember, you must scan the Behemoth during this fight. If you miss it, then you cannot complete the Logbook. |
 |
|
Pheronos |
The final boss of Flare Pool. If you miss the scan here, you can unlock it by scanning Pheronos in the boss hologram chamber in Fury Green. |
 |
All Machine Scans in Flare Pool:
|
Name |
Location |
Image |
|---|---|---|
|
Heavy Maintenance Tank |
You’ll encounter the Heavy Maintenance Tank as a miniboss when you first reach the Entry Bay chamber. |
 |
|
Psy-Bot Shocker |
You encounter the shocker variant when you return to the Entry Bay after rescuing both Gal Fed soldiers. |
 |
|
Psy-Bot Gunner |
You’ll encounter a gunner on your first trip across the Control Room Bridge. |
 |
|
Hover Shuttle Transport |
Missable: The Hover Shuttle Transport miniboss fight takes place on your return trip across the Control Room Bridge after meeting up with Armstrong. Make sure to scan this during the fight, as you will not get another chance. |
 |
|
Lamorn Heavy Turret |
There are several heavy turret variants around Flare Pool. Look for the version with four cannons. |
 |
All Data Log Scans in Flare Pool:
|
Name |
Location |
Image |
|---|---|---|
|
Delivery Status |
Immediately after you enter the Entry Bay chamber, turn right, and you’ll find this Data Log sitting on a desk behind the old delivery truck. |
 |
|
Extraction Process |
Found on a desk tucked away in an alcove in the Energy Extraction chamber. |
 |
|
Injection Process |
Found on a small table in Energy Injection, just before the chamber’s exit. |
 |
|
Facility Shutdown |
After collecting the Energy Tank from the Psychic Container in the small storage chamber of the Overseer Room, you’ll find the final Data Log on a desk just across from where the container was floating. |
 |

All Metroid Prime 4 Amiibo Unlocks and Rewards
Metroid Prime 4 comes with great amiibo features for players to unlock. This guide details what rewards are in store.
All Logbook Scans in Ice Belt – Metroid Prime 4

All Gal Fed Scans in Ice Belt:
|
Name |
Location |
Image |
|---|---|---|
|
Regar Tokabi |
You’ll find Tokabi in the building just after he saves you from the Snow Wolf attack. |
 |
|
VUE-995 |
You’ll find VUE on your return trip to the Ice Belt. He cannot be found on the first visit. They are located in the Equipment Storage chamber, which you can reach by removing the Thunder Blocker from the door to the Main Junction, which is connected to the Lobby chamber on the Surface level. |
 |
All Biology Scans in Ice Belt:
|
Name |
Location |
Image |
|---|---|---|
|
Snow Wolf |
Once you clear the first section of the dungeon, you’ll enter a large open area called the Snowfield. Here, a large group of Snow Wolves will encircle Samus. |
 |
|
Snow Roach |
You’ll find Snow Roaches in many of the iced and snowed-over corridors throughout Ice Belt. They’ll often emerge from corners, or from beneath the snow. |
 |
|
Ice Crawler |
The Ice Crawler is one of the most common enemies in Ice Belt. You’ll see them all over the dungeon. First encountered in the Snowfield Accessway corridor. |
 |
|
Blue Krauk |
Flying creature that you’ll encounter in the Ice Canyon area, near the end of the Medical Bays level. |
 |
|
Dartwing |
Dartwings can be found hanging from the ceilings in several locations around Ice Belt. If you can, try to scan them before they launch at Samus, as you will have very little time once they do. We first encountered them in the Cryopod Conveyor corridor, between the first and second levels. |
 |
|
Frostburn Griever |
Frostburn Grievers are the standard grievers that Samus will encounter in Ice Belt. If you don’t scan them on your first visit to Ice Belt, they will be around in much greater numbers when you return. |
 |
|
Keratos |
The final boss of Ice Belt. If you miss them here, you can scan the hologram in Fury Green. |
 |
All Machine Scans in Ice Belt:
|
Name |
Location |
Image |
|---|---|---|
|
Light Maintenance Tank |
You’ll find the Light Maintenance Tank in the Medical Bays Access corridor that connects the Bio-labs level with Medical Bays. |
 |
All Data Log Scans in Ice Belt:
|
Name |
Location |
Image |
|---|---|---|
|
Endeavor |
Found on a desk in the Bio-labs Security chamber, located on the Bio-labs level. |
 |
|
Gifts |
Found on a bench in the back of the Tracking Operations chamber in Bio-labs. |
 |
|
Security |
Found on a desk in Cryopod Prep, one of the chambers you enter while looking for TK Codes. |
 |
|
Anxiety |
Found on the counter in the Staging Corridor chamber on the Medical Bays level. |
 |
|
Awakening |
Found on a small table on the right immediately after entering the Recovery Corridor on the Medical Bays level. |
 |
|
Analysis |
Located on a small table in the back of the isolated central chamber in the Recovery Bay section on the Medical Bays level. |
 |
|
Breakthrough |
Found sitting on a small desk in the Surgery Corridor, the small chamber between Surgery Bay and Medical Hub on the Medical Bays level. |
 |
|
Attempt |
On a small table in the Storage Corridor chamber, just before the Storage Bay chamber on the Medical Bays level. |
 |
|
Limit |
Found on the left side of the tower in the Storage Bay chamber. Head left at the base instead of right, which leads to the interior of the bay. |
 |
|
Resignation |
On a table at the end of the Staging Corridor path that leads down to the Upper Airlock. Collect this after collecting the previous logs in the Medical Hub area. |
 |
|
Records |
After crossing the Ice Canyon, you’ll find Records log in the Lower Airlock chamber, on a small desk. |
 |
|
Query |
After passing the Save Station in the Power Station, this log can be found on the right immediately after entering the Heat Exchange Column chamber. |
 |
|
Prayer |
This final data log is down on the lower level of the Power Generator chamber. If you look down and to the left from the main platform, you’ll see it right after you enter. |
 |
Research Scan in Ice Belt:
|
Name |
Location |
Image |
|---|---|---|
|
Psychic Tether Node |
While these can be found earlier in the game, we first used them in Ice Belt. When you make it to the Power Generator room, look up above the rings. There, you’ll see the purple glow of psychic objects. Scan them to reveal the Tether Nodes. Scan the nodes to add them to your Logbook. |
 |
All Logbook Scans in Great Mines – Metroid Prime 4

Great Mines Biology Scans in Metroid Prime 4:
|
Name |
Location |
Image |
|---|---|---|
|
Crystal Crawler |
These are the creatures that act as Grapple Points in the Crystal Crevice chamber on Level 2. |
 |
|
Metareetta |
These large bug-like creatures are found on the walls of the caves immediately after dropping into Natural Cavern A from Drilling Site. |
 |
|
Winged Lizard |
These flying creatures can be found in the massive cave area around the Main Shaft. You’ll encounter them as soon as you reach Main Shaft – Level 1. |
 |
|
Cave Shren |
Cave Shrens are found in the Lower Grotto, right after reaching Level 2. |
 |
|
Goura Ghaspore |
After dropping to Level 3, the Goura Ghaspore will be one of the first creatures you encounter. Found in Hive Entry chamber. |
 |
|
Spin Dartwing |
Can be found in the Command Center after opening the Bomb Slot gate. Send the bomb to the slot from far away, and once the gate opens, you’ll see the Spin Dartwings hanging from the ceiling through the door. |
 |
|
Cave Roach |
First found in the Narrow Crevice section of Level 2, before the crystal wall blocking the path. |
 |
|
Maul Griever |
After preparing the massive drill at the Drilling Site, a large amount of Maul Grievers will attack. They will then appear regularly throughout the dungeon. Griever Bombers also count toward this unlock. |
 |
|
Maul Griever Brute |
The Brute version of this enemy is encountered in the Quarry section on Level 2. |
 |
|
Omega Griever |
Final boss of Great MInes. Found in the Crystal Extraction chamber at the end of Level 3. If you miss them here, you can get the scan in the boss hologram chamber in Fury Green. |
 |
|
Snare Weed |
Found along the floors of the cave systems of the Great MInes. First encountered after dropping into the hole in Garnbocask Site B. |
 |
|
Pop Crawler |
These enemies will pop up from the ground to launch projectiles at Samus. They are first encountered in the Garnbocask Site A section of Level 1. |
 |
All Sol Valley Logbook Scans in Metroid Prime 4

All Biology Scans in Sol Valley:
|
Name |
Location |
Image |
|---|---|---|
|
Sand Griever |
Found throughout the desert. Often found coming up from the sand outside Shrines. |
 |
|
Polaleisoarala |
These flying creatures can be found circling in the air above shrines, but they are easily scared away. They can also easily be confused with Gullbats, so make sure you have both scanned! Keep your eye on the sky, and you’ll eventually come across a group of them. |
 |
|
Web Crawler |
Web Crawlers are only found in the Ladder of Thought shrine, on the western edge of the desert, just north of Fury Green. |
 |
|
Gullbat |
Gullbats often fly around the desert in large groups. They will suddenly appear overhead as Samus is driving Vi-O-La. They can also sometimes be found resting on the sand. |
 |
|
Sand Crawler |
Found crawling along the magnetic tracks in the Falling Labyrinth Shrine. |
 |
|
Sand Shren |
Sand Shren nests are often found in the Gal Fed Debris fields, or on statues and cliffs near the entrances to dungeons. They can always be found at the Entrance to Fury Green. |
 |
|
Varmis |
Varmis is found in the flat, wide-open section of desert next to the eastern Gal Fed debris field. You can scan Varmis early in the game, or wait until you collect the Mech Parts and scan it during the boss fight. |
 |
All Machine Scans in Sol Valley:
|
Name |
Location |
Image |
|---|---|---|
|
Aeronaut |
The Aeronaut is the only flying machine in Sol Valley. They will swoop in and drop mines around Samus as she rides Vi-O-La. |
 |
|
Marauder |
Marauders are the machines that roll across the sand like a large wheel. They will show up frequently to give Samus any number of headaches. Like the Aeronaut, they are impossible to miss. |
 |
All Research Scans in Sol Valley:
|
Name |
Location |
Image |
|---|---|---|
|
Kyuveria |
These bulbs are the plants that restore the Vi-O-Las Boost tank. |
 |
|
Green Energy Crystal |
The Green Energy Crystal is found all throughout the Sol Valley desert. There will always be more to scan, but its better to get it taken care of early. |
 |

Flare Pool 100% Completion Walkthrough for Metroid Prime 4
A complete guide to finding every item and successfully completing Metroid Prime 4’s Flare Pool dungeon.
All Chrono Tower Logbook Scans in Metroid Prime 4

Sylux Forces Scans in Chrono Tower:
These final scans are available once you reach Chrono Tower during the endgame sequence. Your goal should be to make these final two scans the last you unlock.
|
Name |
Location |
Image |
|---|---|---|
|
Lockjaw |
Missable: One of two final encounters in Chrono Tower. Make sure you scan, or you will not reach 100%. |
|
|
Sylux |
MIssable: Final boss. Make sure you scan here. |
All Missable Scans in Metroid Prime 4

There are only a handful of missable scans in Metroid Prime 4, but if you miss them, you will be locked out of the game’s true ending. We highlighted them in each section, but we’ll gather them all below. There are 10 missable scans, which are:
Prologue:
- Space Pirate
- Galactic Federation Trooper
- Aberax
Fury Green:
- Carvex Vine
- Carvex Pollen Sac
Flare Pool:
- Hover Transport Shuttle
- Swim Snatcher
- Behemoth